


Homemade apron
Make of the month now and it is perfect for you bakers or clean people out there. A homemade apron. How adorable!
Ok so I chose to create this as I found a piece of material that I used to make a cushion out of and the shape that was left was perfect to wrap around my waist and create an apron.
So here is 'Homemade apron'...
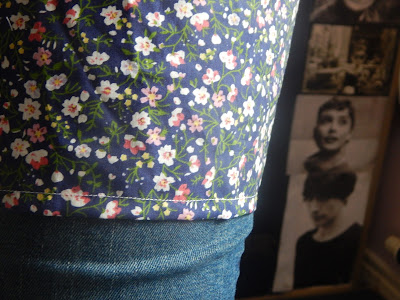
4. Depending on if you used the ends of the fabric, you may not need to sew the side edges up, but if you didn't or they are looking untidy then fold a bit of the material over and sew along.


Ok so I chose to create this as I found a piece of material that I used to make a cushion out of and the shape that was left was perfect to wrap around my waist and create an apron.
So here is 'Homemade apron'...
What you will need:
Material that is big enough to fit around your waist
Scissors
Felt (if you are doing a little pocket, I did a cupcake so needed three colours)
Pins and thread or sewing machine
Fabric glue
Paper and pencil
Fabric chalk
What to do now:
1. Take your fabric, wrap it around your waist and see where it sits on your legs.
Then fold it in half and measure out your fasteners (the straps of your apron), including a 1cm seam allowance and mark this out with the fabric chalk.
Cut out an L shape from one end to where your straps are and then cut along your the strap.
Don't worry, you can make a cushion out of the remaining fabric so it doesn't go to waste.
2. On the top, where your straps are, cut 1cm downwards (towards the bottom edge) and fold this over and sew along here.
 |
| This is what it should look like after step 1 |
3. On both straps, at the beginning of them, cut along that 1cm seam allowance (towards the side edges) and fold over, pin, and then sew along this, folding over the very end and secure this with the thread as well. Do this for both straps.
 |
| What the top should look like after steps 2 and 3 |
If you didn't need to do step 4 then turn over the bottom edge and sew along this, although you will need to do this if you had to.
5. All or minus the sides edges should be all sewn now and you should have your apron now.
It is up to you if you want to include a pocket on it and what you actually do, I just find them really useful for putting things in.
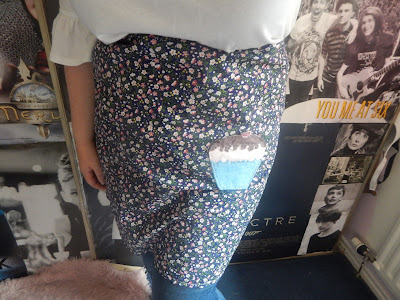
So I drew out a cupcake free hand to the size pocket I wanted on a piece of paper. It is just big enough to put my iPhone 4 in, just to give you a rough size of what I drew. I cut out this template, with all of the icing and case drawn on and cut around the chosen felt (pale pink). I then cute out the icing in the brown felt and sewed this onto the pink felt. I did this for the blue case and the cherry on top. Around the edges of the cupcake, I used fabric glue just to secure it all together more.
Let that dry.
6. Put on your apron, mark very lightly out where you wish to place your pocket and sew it on, going around twice to secure but leaving the top free from thread of course!!!
 |
| The pocket all stitched together |
And voila, you have your pocket and you have a finished apron!
The final product...


I love this so much, it was so easy to make considering I thought it would be quite hard.
Due to the fact I had the template already cut out, without even knowing it, because of the cushion I made, all I had to do was sew up most of the edges and make the little cupcake pocket.
I am just really happy at how it came out, the pocket I made is big enough for my phone so could also fit some (measuring) spoons or a small whisk I sometimes use in the kitchen.
Now I will always be ready for baking!


Comments
Post a Comment